
In this post we’ll see how-to create a SplashScreen for an Android App. In this tutorial we’ll use the version 2.2.2 of Android Studio. At the end of the post there is a video that shows all the operations.
Before starting, let’s see what is a SplashScreen and why we use it. A SplashScreen it’s the first screen that appear when an App is launched. Sometimes we use it for promote our project and/or to provide information about the usage of the App. Sometimes we use it for technical reasons, so in the meantime that the App is loading the library that it needs, we show an image instead of having a black screen.
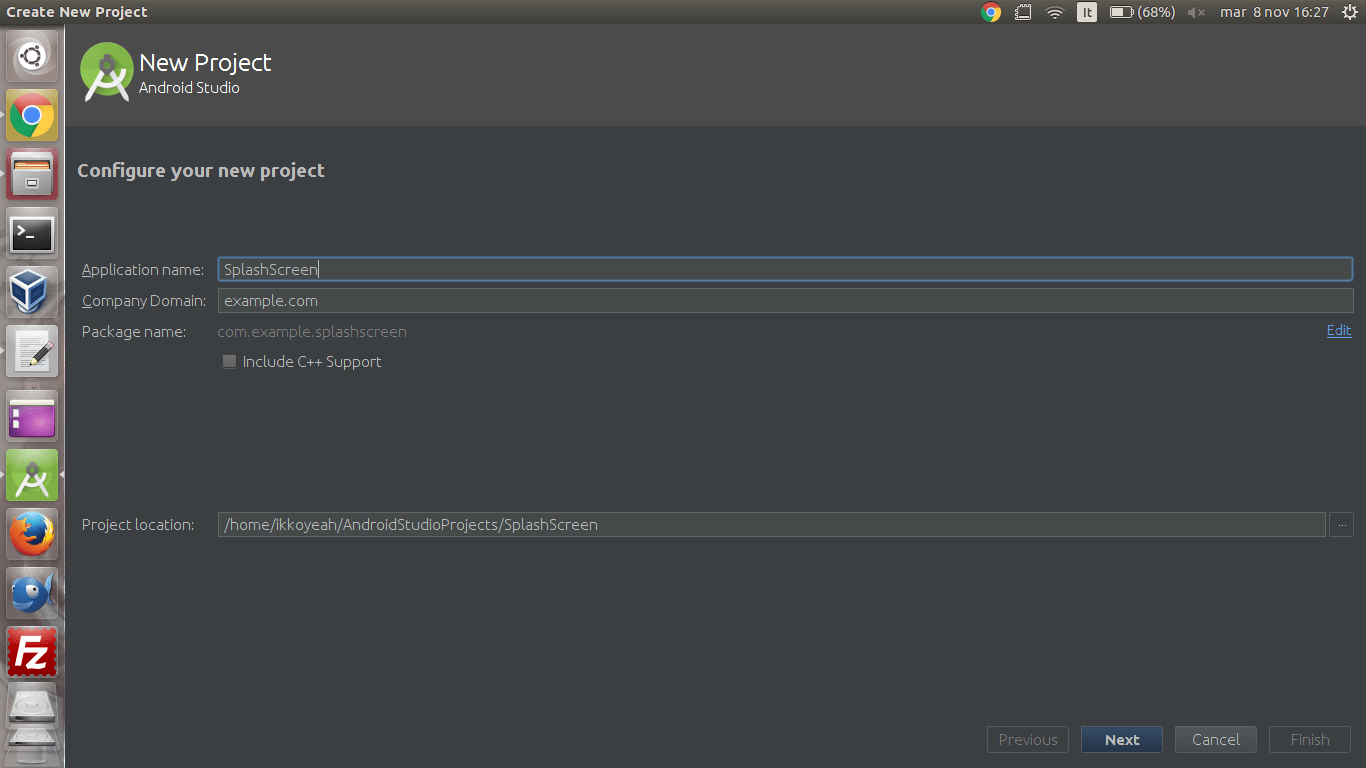
Let’s setup our project. First we open Android Studio. We select “Start a new Android Studio Project” if we are in the home screen or we go on the menu File->New and we select “New project” if the program is already running. In the first box related to the creation of our project we choose the name “SplashScreen” in the field Application name and we click on “Next”:
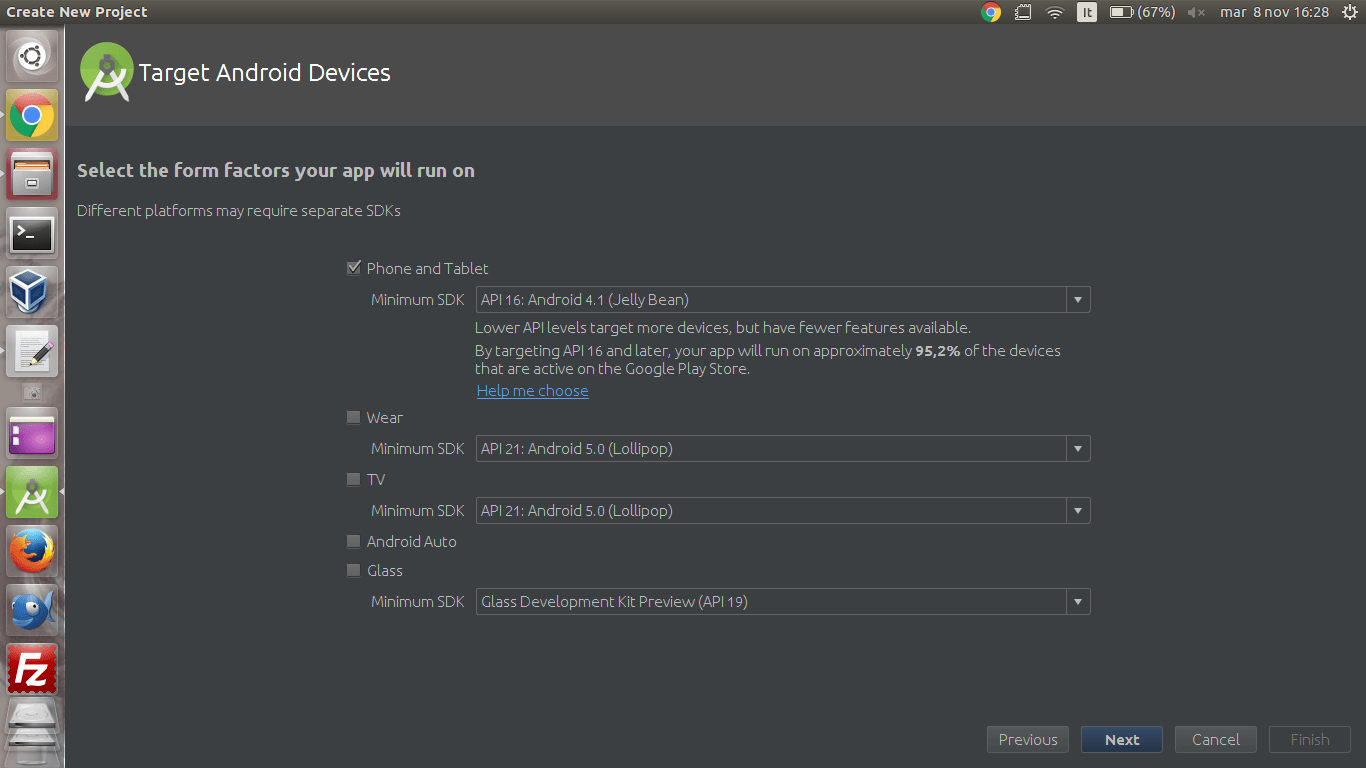
In the second box we can choose which is the minimum android version that our App is able to support. We leave all as it is and we click on “Next”:
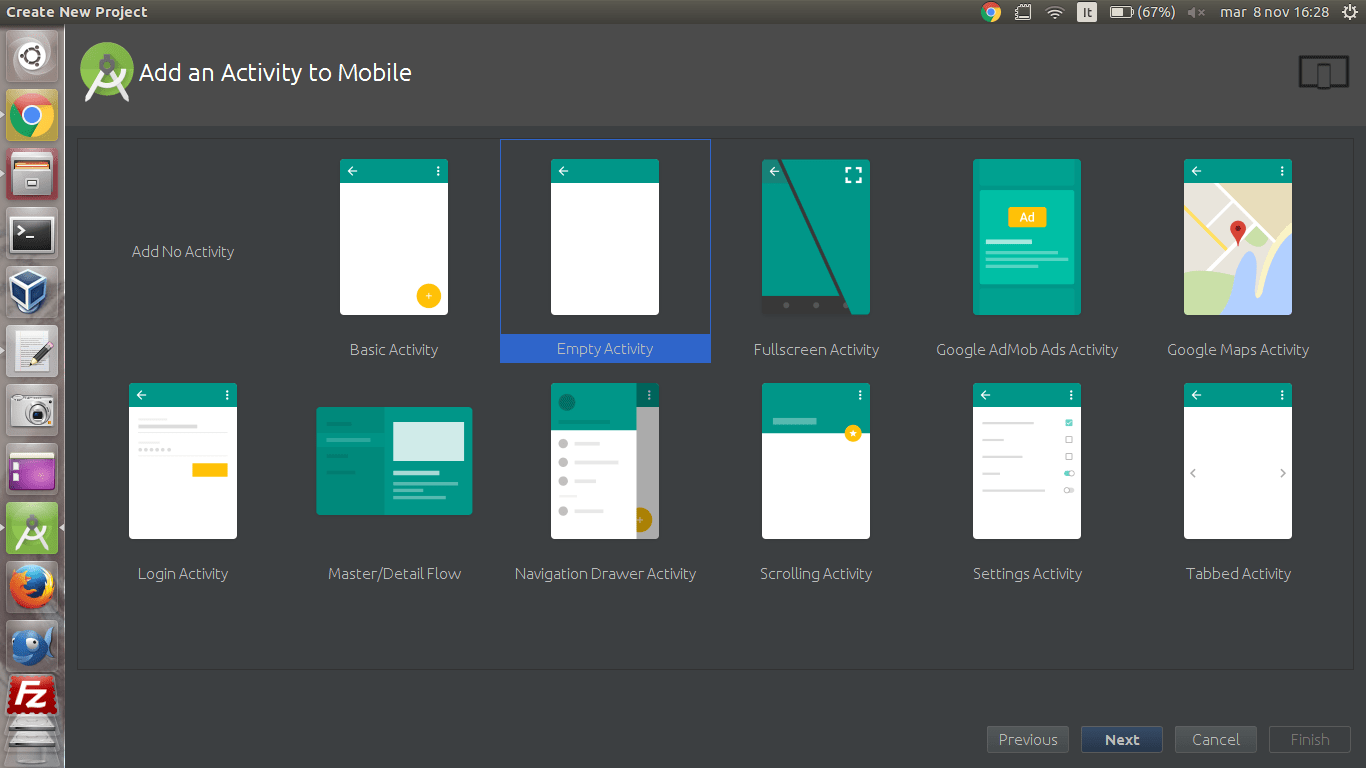
In the third box we select “Empty Activity” and we click on “Next”:
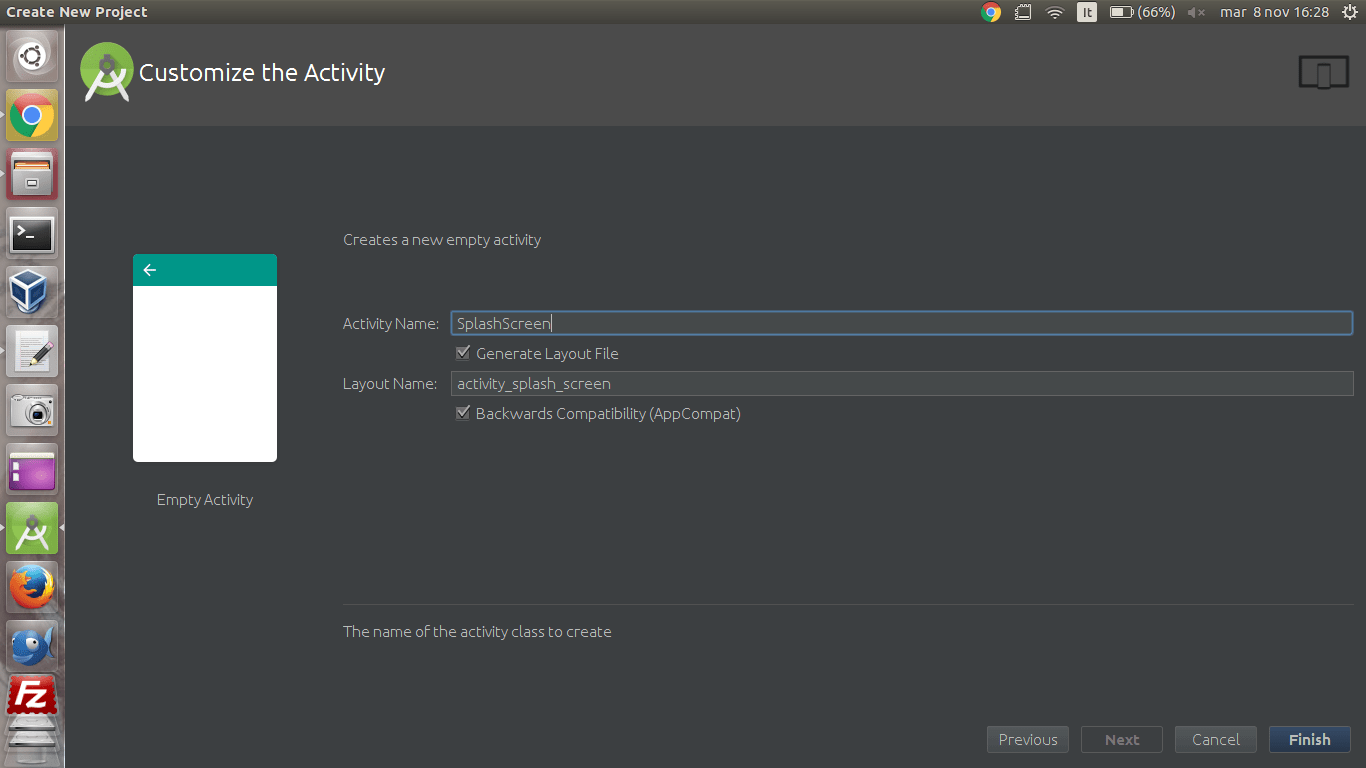
In the last box we change the name of the Activity with “SplashScreen” and we press on “Finish”:
Now we have created our project.
Before starting coding we create a new Activity (the one that will be executed at the end of the SplashScreen). We go on menu File->New->Activity and we select “Empty Activity”. Now will appear this box:
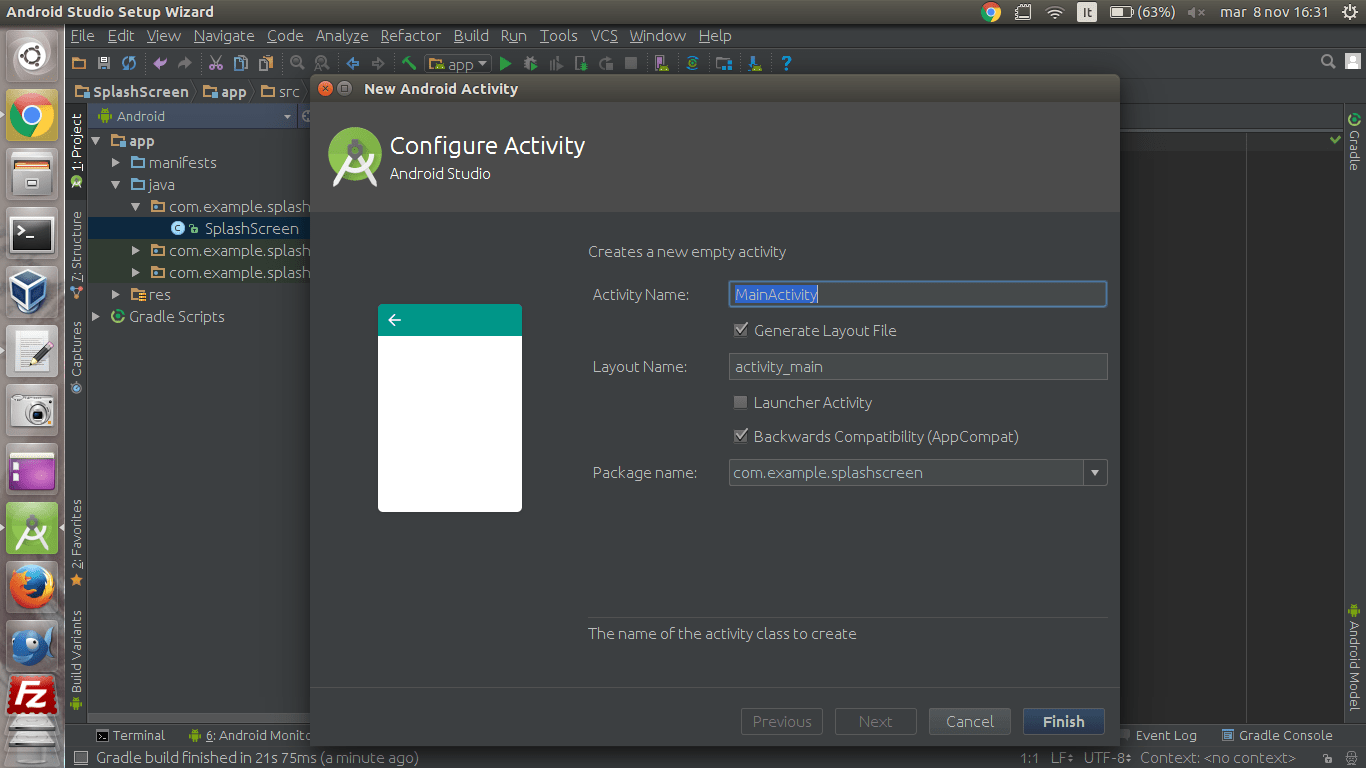
We press “Finish” to create the new Activity. Now we have to modify three files:
AndroidManifest.xml is the file that contains all the main characteristics of all the Activities of the App.
SplashScreen.java is the Java code associated with the SplashScreenActivity .
activity_splash_screen.xml is the xml file that defines the layout of the SplashScreenActivity.
First of all we modify the theme of the Activity SplashScreen removing the ActionBar and setting the App orientation to portrait. For doing that we go in AndroidManifest.xml (that is in the folder app/manifests/) and we add the following lines beetween “.SplashScreen” and the character “>”:
android:theme="@android:style/Theme.NoTitleBar.Fullscreen"
android:screenOrientation="portrait">
After this operation the file AndroidManifest.xml will be as it follows:
<?xml version="1.0" encoding="utf-8"?>
<manifest xmlns:android="http://schemas.android.com/apk/res/android"
    package="com.example.splashscreen">

    <application
        android:allowBackup="true"
        android:icon="@mipmap/ic_launcher"
        android:label="@string/app_name"
        android:supportsRtl="true"
        android:theme="@style/AppTheme">
        <activity android:name=".SplashScreen"
            android:theme="@android:style/Theme.NoTitleBar.Fullscreen"
            android:screenOrientation="portrait">
            <intent-filter>
                <action android:name="android.intent.action.MAIN" />

                <category android:name="android.intent.category.LAUNCHER" />
            </intent-filter>
        </activity>
        <activity android:name=".MainActivity"></activity>
    </application>

</manifest>
Now we are going to modify the layout of the Activity of tge SplashScreen. We select the Text mode (bottom tab) of the file activity_splash_screen.xml (that is in the folder app/res/layout/) and we add the following line after android:paddingTop=”16dp” to set the background color to white (default is black):
android:background="#fff"and we modify the properties of the TextView :
 <TextView
     android:layout_width="match_parent"
     android:layout_height="wrap_content"
     android:layout_centerVertical="true"
     android:layout_centerHorizontal="true"
     android:text="Hello World!"
     android:textAlignment="center"
     android:textSize="40sp"
     android:textColor="#000"
     android:textStyle="bold"
 />
After this operations the content of the file activity_splash_screen.xml will be as it follows:
<?xml version="1.0" encoding="utf-8"?>
<RelativeLayout xmlns:android="http://schemas.android.com/apk/res/android"
    xmlns:tools="http://schemas.android.com/tools"
    android:id="@+id/activity_splash_screen"
    android:layout_width="match_parent"
    android:layout_height="match_parent"
    android:paddingBottom="@dimen/activity_vertical_margin"
    android:paddingLeft="@dimen/activity_horizontal_margin"
    android:paddingRight="@dimen/activity_horizontal_margin"
    android:paddingTop="@dimen/activity_vertical_margin"
    android:background="#fff"
    tools:context="com.example.splashscreen.SplashScreen">

    <TextView
        android:layout_width="wrap_content"
        android:layout_height="wrap_content"
        android:text="Hello World!" />
</RelativeLayout>
Now we have to specify the beahvior of the Activity and of the SplashScreen. We open the file SplashScreen.java (that is in the folder app/java/com.example.splashscreen/) and we modify:
– Fisrt of all we change AppCompatActivity to Activity and we press the button Alt and Return to import the corresponding library
– We declare the variable int SPLASH_TIME_OUT = 3000 before the line @Override and so we define the duration in milliseconds of the SplashScreen
– Inside the method OnCreate we add the following code pressing Alt and Return everytime that we have to import a new library:
new Handler().postDelayed(new Runnable() {
 @Override
 public void run() {
      Intent i = new Intent(SplashScreen.this, MainActivity.class);
      startActivity(i);
      finish();
 }
 }, SPLASH_TIME_OUT);
After this operation the content of the file SplashScreen.java will be as it follows:
package com.example.splashscreen;
import android.content.Intent;
import android.os.Handler;
import android.app.Activity;
import android.os.Bundle;
public class SplashScreen extends Activity {
int SPLASH_TIME_OUT = 3000;
@Override
protected void onCreate(Bundle savedInstanceState) {
super.onCreate(savedInstanceState);
setContentView(R.layout.activity_splash_screen);
new Handler().postDelayed(new Runnable() {
@Override
public void run() {
Intent i = new Intent(SplashScreen.this, MainActivity.class);
startActivity(i);
finish();
}
}, SPLASH_TIME_OUT);
}
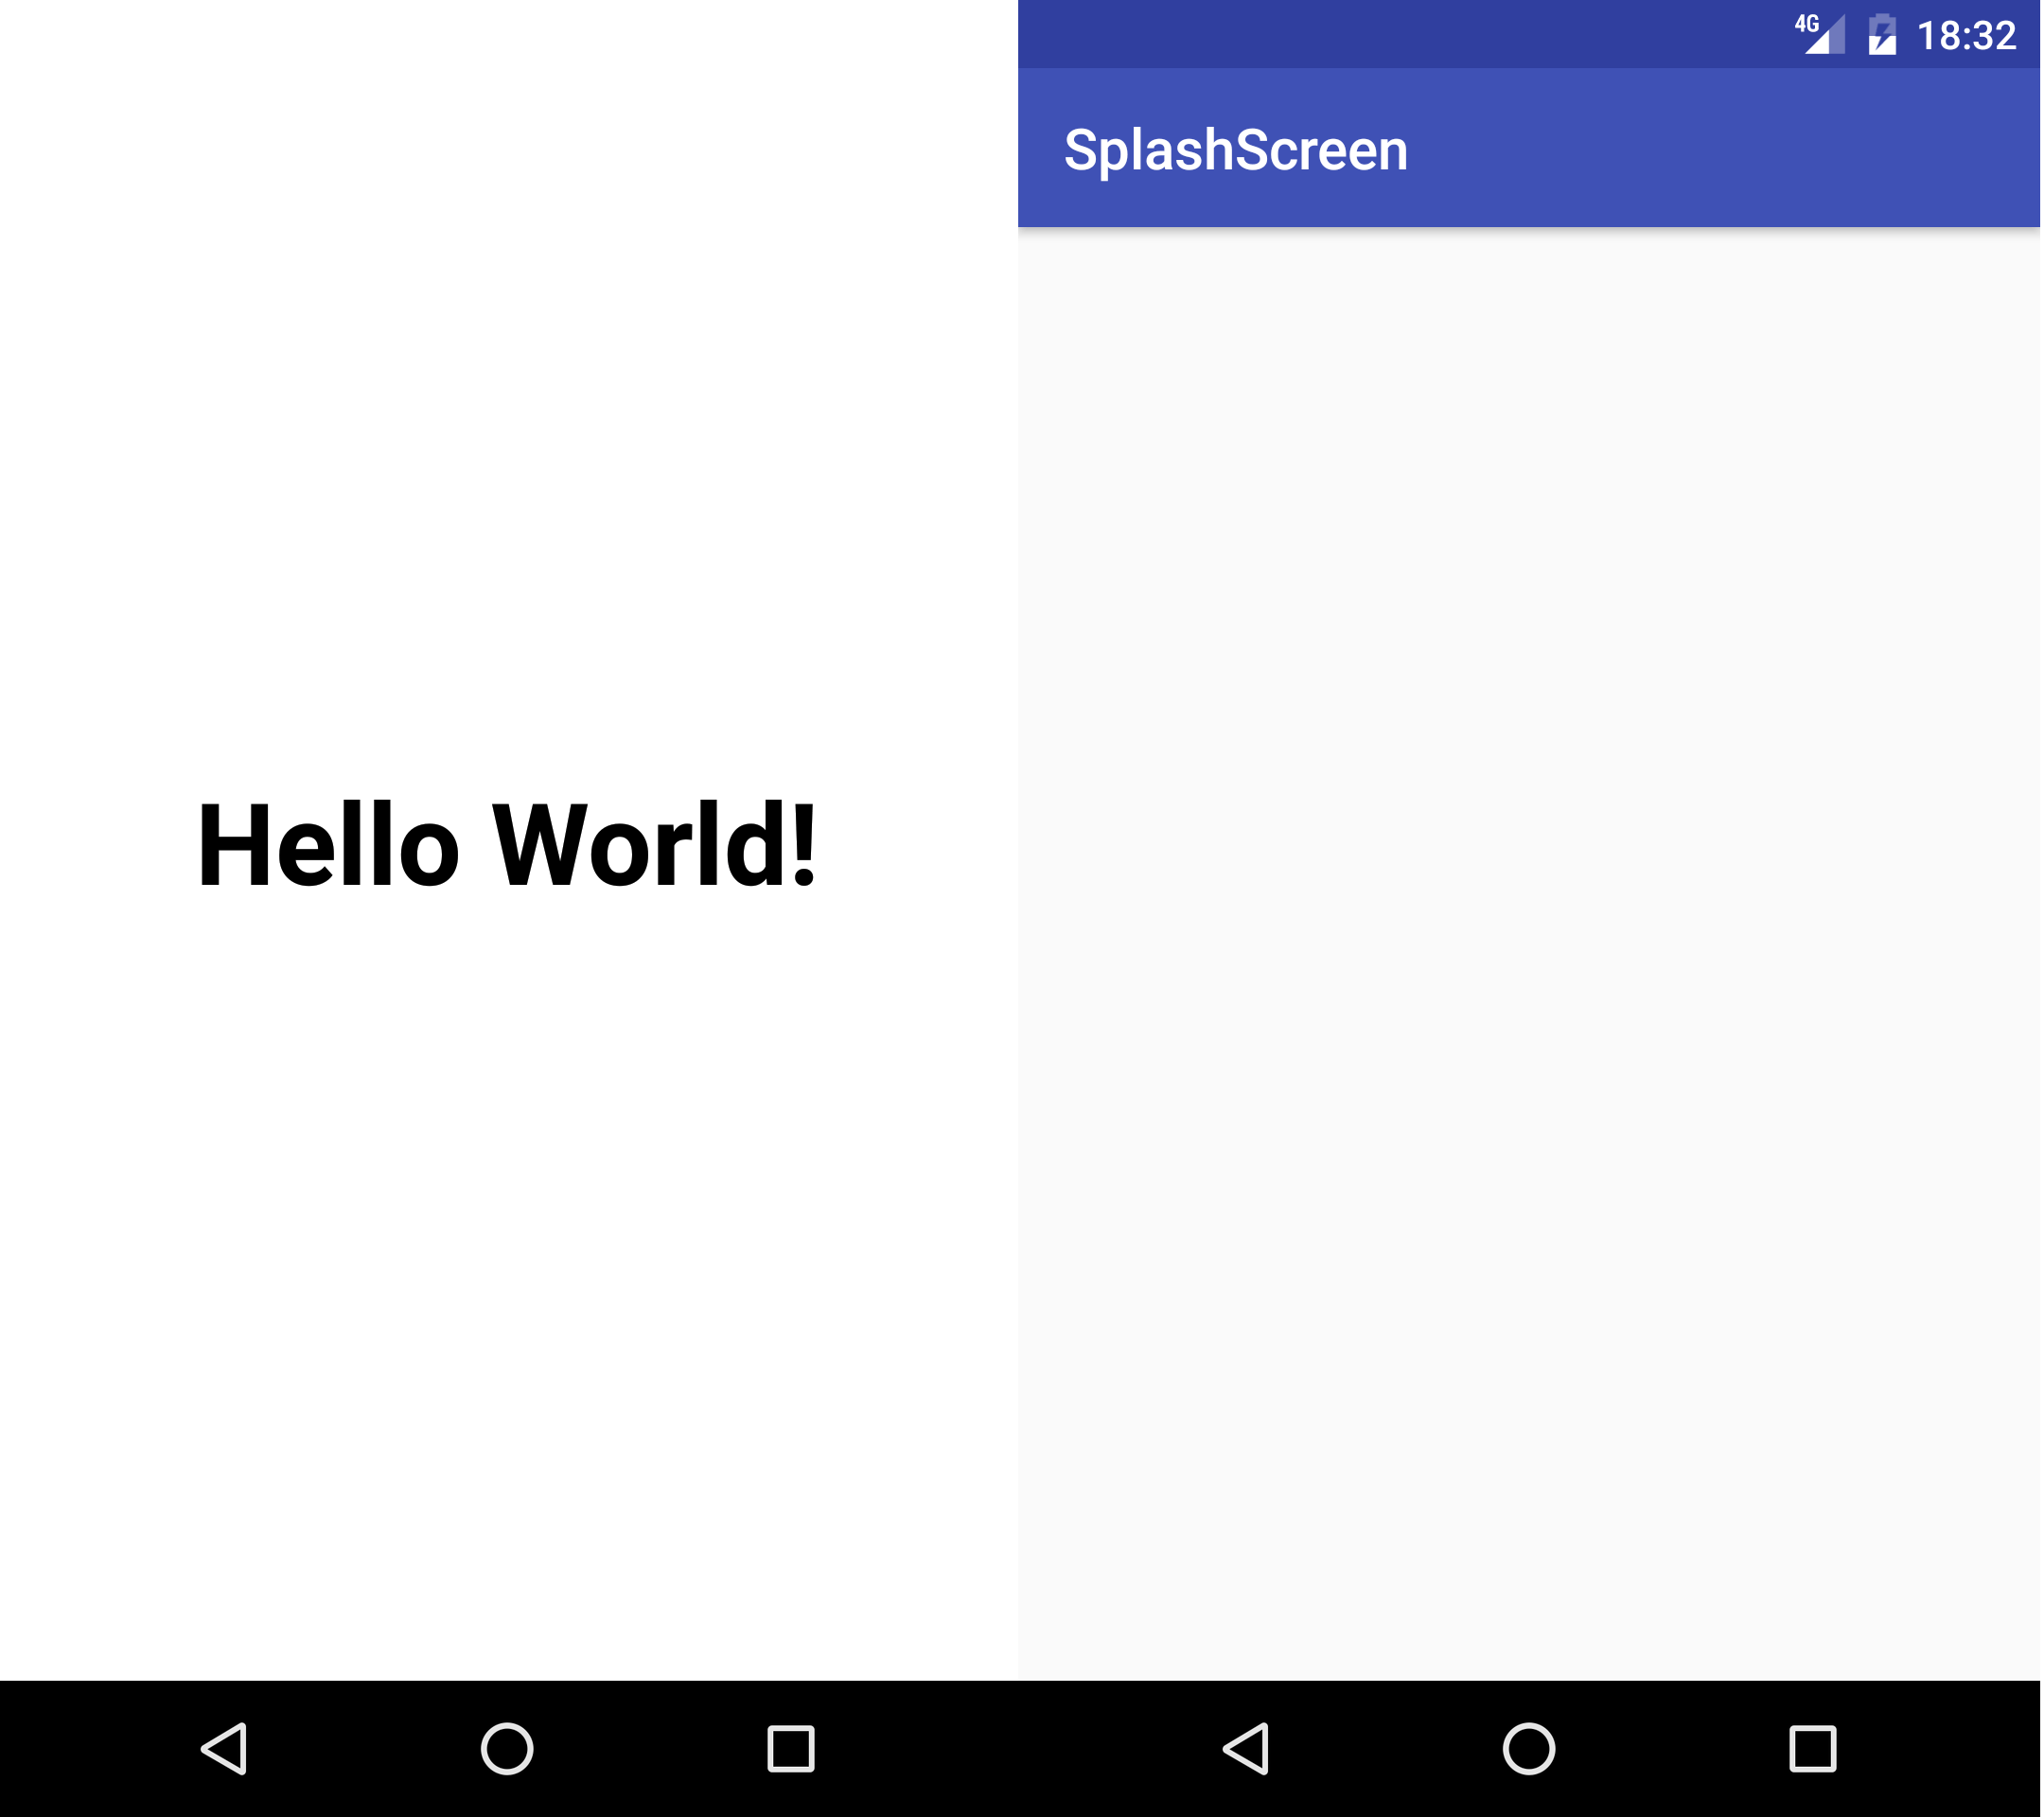
}In the end we press the icon ![]() that permits to simulate our app on our smartphone or with an emulator. Final result:
that permits to simulate our app on our smartphone or with an emulator. Final result: